Optimized docker images for Spring Boot applications with layering feature
Since Spring Boot 2.3, support for building jar files with contents separated into layers has been added to the Maven and Gradle plugins.
The question is : How this layering can help us to improve our docker images ?
Let's see how Spring Boot defines layering :
The layering separates the jar’s contents based on how frequently they will change.
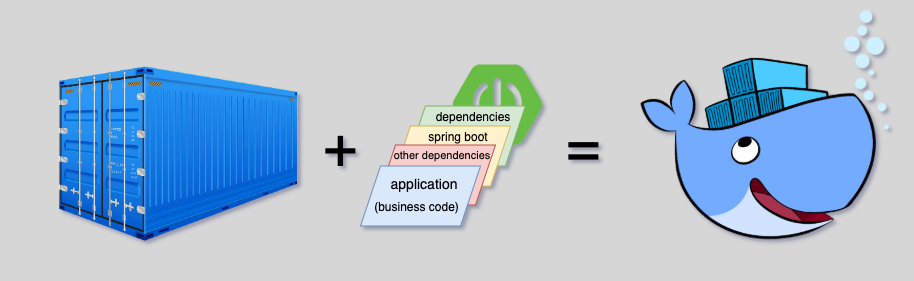
Spring Boot uses fat Jar as default packaging format. If we inspect our application by checking this fat Jar, we can observe that our business code (application) forms a small part of this big jar file. The rest of parts forms the framework, external dependencies and some internal dependencies as we'll see with multi-module projects.
Code example
This post has a working code example available here.
How to read
During this post, I'll go progressively through the optimization of our docker image based on a sample of Spring Boot application.
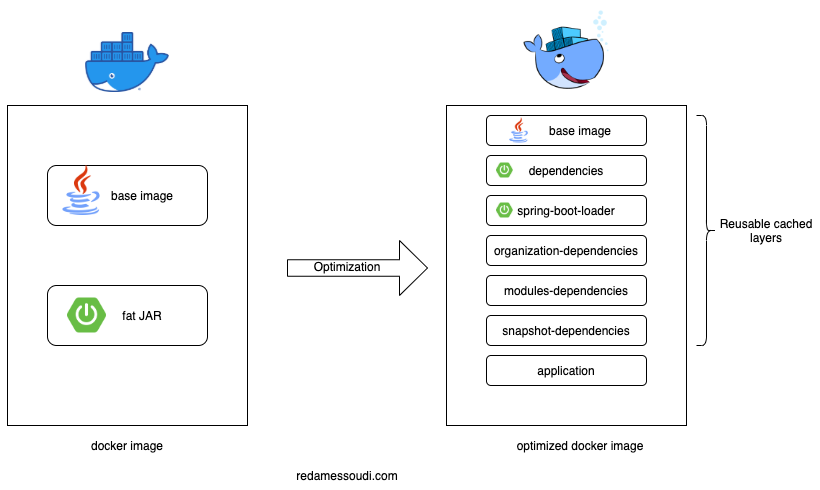
Our goal through this post is to reach the following result:
Base code
Let's create a basic Spring Boot application with a simple /hello endpoint to use as sample for the following. You can get it under branch '/nodocker'.
Basic dockerization of Spring Boot application
Code
The code of this section is available under branch '/initdockerization'.
Details
As a first step, we'll dockerize our sample application by a simple Dockerfile which looks like:
FROM adoptopenjdk/openjdk11:alpine-jre
ARG JAR_FILE=target/*.jar
COPY ${JAR_FILE} application.jar
EXPOSE 8081
ENTRYPOINT ["java","-jar","/application.jar"]Now we can :
- pack our application to a fat Jar with Maven
mvn clean package
- and build the docker image
docker build -t optimized_dockerimage_springboot:0.0.1 .
By checking our image size, it's around 167 MB and by using Dive we can see that the application layer is 16 MB which is a significant part of the image size.
dive optimized_dockerimage_springboot:0.0.1

If you don't have Dive or you want to continue without it, you can get similar result using:
docker history --format "{{.ID}} {{.CreatedBy}} {{.Size}}" optimized_dockerimage_springboot:0.0.1
You would say 16 MB isn't such big size but here our sample application contains only one class with some lines, but consider the sizes of real production-ready applications (fat Jars), it can more larger as the complexity and dependencies growth.
What's the problem with large size application ?
The aim of docker images is to be lightweight and reusable as much as possible so our deployment and release processes can be faster.
With large docker images and frequent release cycle we can end by a lot of gigabytes of storage space and increase the network traffic which can be a very bad design specially in cloud environment and when you pay for the traffic usage and storage.
Another problematic thing with unoptimized docker images is performance during Scheduling process.
What's Scheduling ?
In a nutshell, scheduling is how containers are placed and run on your instance.
Take one container with 1GB, managing it couldn't be tricky but what if you have multiple containers with 1GB ?
Every time, pulling this 1GB from your registry causes a long scheduling process and long build times in CI pipelines.
Think about scalability, think about time needed by your orchestration system to place this containers on your instance(s) and think about problems that you can face every time you deploy your 1GB containers.
Add new feature to our application
Now we want to add a new endpoint to our controller which means new feature and new release of our application.
Once the new feature is implemented and our new application version is released we can use the same basic dockerization and build our new docker image version right ?
But the problem here is that our basic dockerization can't see the small size and difference added by our new feature. This new docker image will be built with all our Spring framework dependencies, internal and external dependencies instead of considering the thin change on our business code.
Can we optimize ?
Of course we can.
As explained in the intro, Spring Boot 2.3 made it possible to extract content of our fat Jar without any additional plugins.
This possibility allows us to easily include additional separation between our project dependencies.
Optimized docker image
Code
The code of this section is available under branch '/optimized_dockerimage'
Layering
Spring Boot splits the content of *fat Jar* to 4 layers but by default this layering feature is disabled and needs to be explicitly enabled with the Spring Boot Maven plugin:
<build>
    <plugins>
        <plugin>
        <groupId>org.springframework.boot</groupId>
        <artifactId>spring-boot-maven-plugin</artifactId>
        <configuration>
            <layers>
                <enabled>true</enabled>
            </layers>
        </configuration>
        </plugin>
    </plugins>
</build>The 4 layers by default are like following :
-
dependencies: Contains dependency without SNAPSHOT version -
spring-boot-loader: Includes JAR loader classes -
snapshot-dependencies: Contains any dependency with SNAPSHOT version -
application: Includes application classes and resources
And this application layer will be our main changing layer while our development progress.
To obtain this layering information, we do:
java -Djarmode=layertools -jar target/*.jar list
Until now we just got what compound the layers of our fat Jar.
Next step is to extract those layers to create an optimized docker image. Hopefully, the -Djarmode=layertools system property exists with extract command in aim to extract layers from the jar file and unpack it into seperate directories.
Take-away
If you want to extract in a specific folder/destination, just add --destination argument like:
java -Djarmode=layertools -jar target/*.jar extract --destination target/extractedBuild docker image
A Docker image is composed of a stack of layers each representing an instruction in our Dockerfile, so we can use those extracted layers from fat Jar to construct Docker layers that change the least.
Let's build our docker image while taking benefit of layering feature and multi-stage build.
FROM adoptopenjdk/openjdk11:alpine-jre as builder
# First stage : Extract the layers
WORKDIR application
ARG JAR_FILE=target/*.jar
COPY ${JAR_FILE} application.jar
RUN java -Djarmode=layertools -jar application.jar extract

FROM adoptopenjdk/openjdk11:alpine-jre as runtime
# Second stage : Copy the extracted layers
COPY --from=builder application/dependencies/ ./
COPY --from=builder application/spring-boot-loader ./
COPY --from=builder application/snapshot-dependencies/ ./
COPY --from=builder application/application/ ./
CMD ["java", "org.springframework.boot.loader.JarLauncher"]You may notice that no application JAR to run with java -jar. Instead we use the org.springframework.boot.loader.Launcher class which is a special bootstrap class that is used as an executable jar’s main entry point. It's the actual Main-Class in the jar file, and it is used to setup an appropriate URLClassLoader and call the main() method.
Now we can :
- pack our application to a layered fat Jar with Maven:
mvn clean package
- and build the docker image:
docker build -t optimized_dockerimage_springboot:0.0.2 .
By verifying our optimized docker image size, it's around 167 MB (same size) but by using Dive we can see that the application code is only 5.7 kB which is a very lightweight part of the image size.

Now every time we build our docker image, existing layers that have not changed can be reused and only this layer of 5.7 kB will change/growth while delivering new releases (new features, bug fixing, ...).
Optimized docker image with multi-module project
What we did until now was good for most applications but it's possible that in some projects we need to go differently than the out-of-the-box provided by Spring Boot.
For example, we might have some company dependencies that change less frequently than our application or we can have a multi-module project with internal dependencies with different change cadence. We'll cover all that in this section.
Code
The code of this section is available under branch '/multimodule_optimized_dockerimage'.
Multi-module project
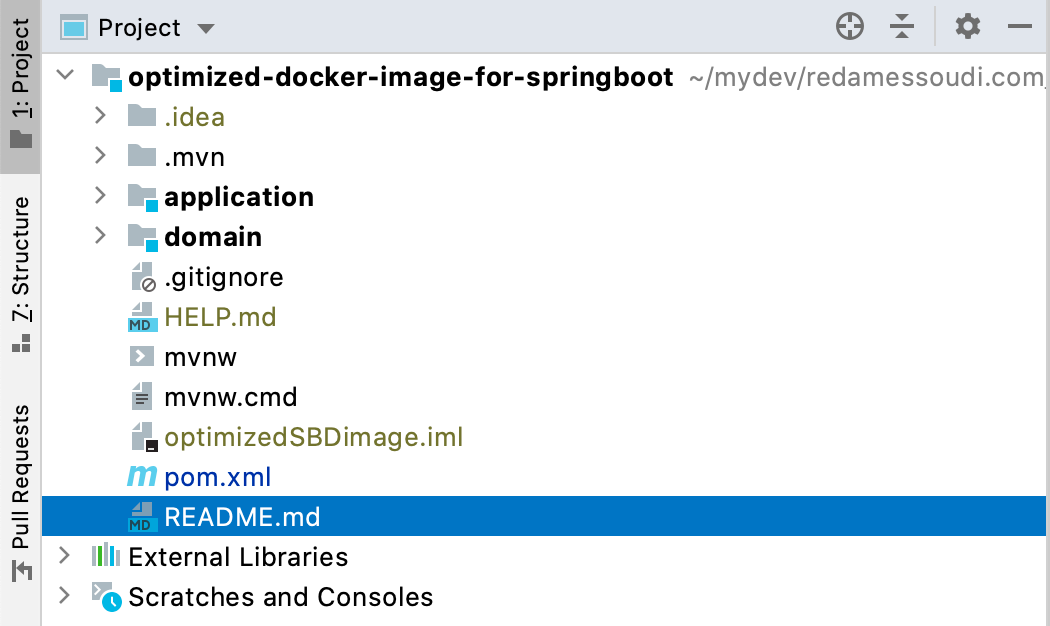
First let's change our sample application to a multi-module maven project.
Our project will look like:
domain: Contains our module of domain classes (models, ...)application: Contains our controllers, ...- and you can also add if you want other modules like
persistence,security, ...
We need to adjust our different pom.xml files, you can take a look on the dedicated branch of this section.
Custom layers configuration
Let's tune how layers are created and add new ones. This can be done using a separate layers.xml file that should be :
- registred (
application/pom.xml):
    <build>
        <plugins>
            <plugin>
                <groupId>org.springframework.boot</groupId>
                <artifactId>spring-boot-maven-plugin</artifactId>
                <executions>
                    <execution>
                        <id>repackage</id>
                        <goals>
                            <goal>repackage</goal>
                        </goals>
                    </execution>
                </executions>
                <configuration>
                    <layers>
                        <enabled>true</enabled>
                        <includeLayerTools>true</includeLayerTools>
                        <configuration>${project.basedir}/src/layers.xml</configuration>
                    </layers>
                </configuration>
            </plugin>
        </plugins>
</build>- configured (
application/src/layers.xml):
<layers xmlns="http://www.springframework.org/schema/boot/layers"
  xmlns:xsi="http://www.w3.org/2001/XMLSchema-instance"
  xsi:schemaLocation="http://www.springframework.org/schema/boot/layers
                      https://www.springframework.org/schema/boot/layers/layers-2.3.xsd">
  <application>
    <into layer="spring-boot-loader">
      <include>org/springframework/boot/loader/**</include>
    </into>
    <into layer="application"/>
  </application>
  <dependencies>
    <into layer="snapshot-dependencies">
      <include>*:*:*SNAPSHOT</include>
    </into>
    <into layer="modules-dependencies">
      <include>com.redamessoudi.optimizeddockerimage:*:*</include>
    </into>
    <into layer="organization-dependencies">
      <include>com.redamessoudi*:*:*</include>
    </into>
    <into layer="dependencies"/>
  </dependencies>
  <layerOrder>
    <layer>dependencies</layer>
    <layer>spring-boot-loader</layer>
    <layer>organization-dependencies</layer>
    <layer>modules-dependencies</layer>
    <layer>snapshot-dependencies</layer>
    <layer>application</layer>
  </layerOrder>
</layers>The configuration file above describes how the jar can be separated into layers, and the order of those layers.
The layers XML format is defined in three sections:
-
application: defines how the application classes and resources should be layered. -
dependencies: defines how dependencies should be layered. -
layerOrder: defines the order that the layers should be written.
More information about different blocks of this file can be found under official documentation.
Keep in mind that include schema is group:artifact[:version] and allows to use Ant matcher patterns.
As we want to add a :
- layer containing all modules dependencies (
<include>com.redamessoudi.optimizeddockerimage:*:*</include>). - layer containing all organization/company dependencies (
<include>com.redamessoudi*:*:*</include>)
regardless of their version, so we used wildcard to match every artifactId and version with the specified groupId.
Docker layers optimization
Let's adjust our Dockerfile to support the 2 new layers (modules-dependencies and organization-dependencies).
Our new Dockerfile will look like:
FROM adoptopenjdk/openjdk11:alpine-jre as builder
# First stage : Extract the layers
WORKDIR application
ARG JAR_FILE=target/*.jar
COPY ${JAR_FILE} application.jar
RUN java -Djarmode=layertools -jar application.jar extract

FROM adoptopenjdk/openjdk11:alpine-jre as runtime
# Second stage : Copy the extracted layers
COPY --from=builder application/dependencies/ ./
COPY --from=builder application/spring-boot-loader ./
COPY --from=builder application/organization-dependencies ./
COPY --from=builder application/modules-dependencies ./
COPY --from=builder application/snapshot-dependencies/ ./
COPY --from=builder application/application/ ./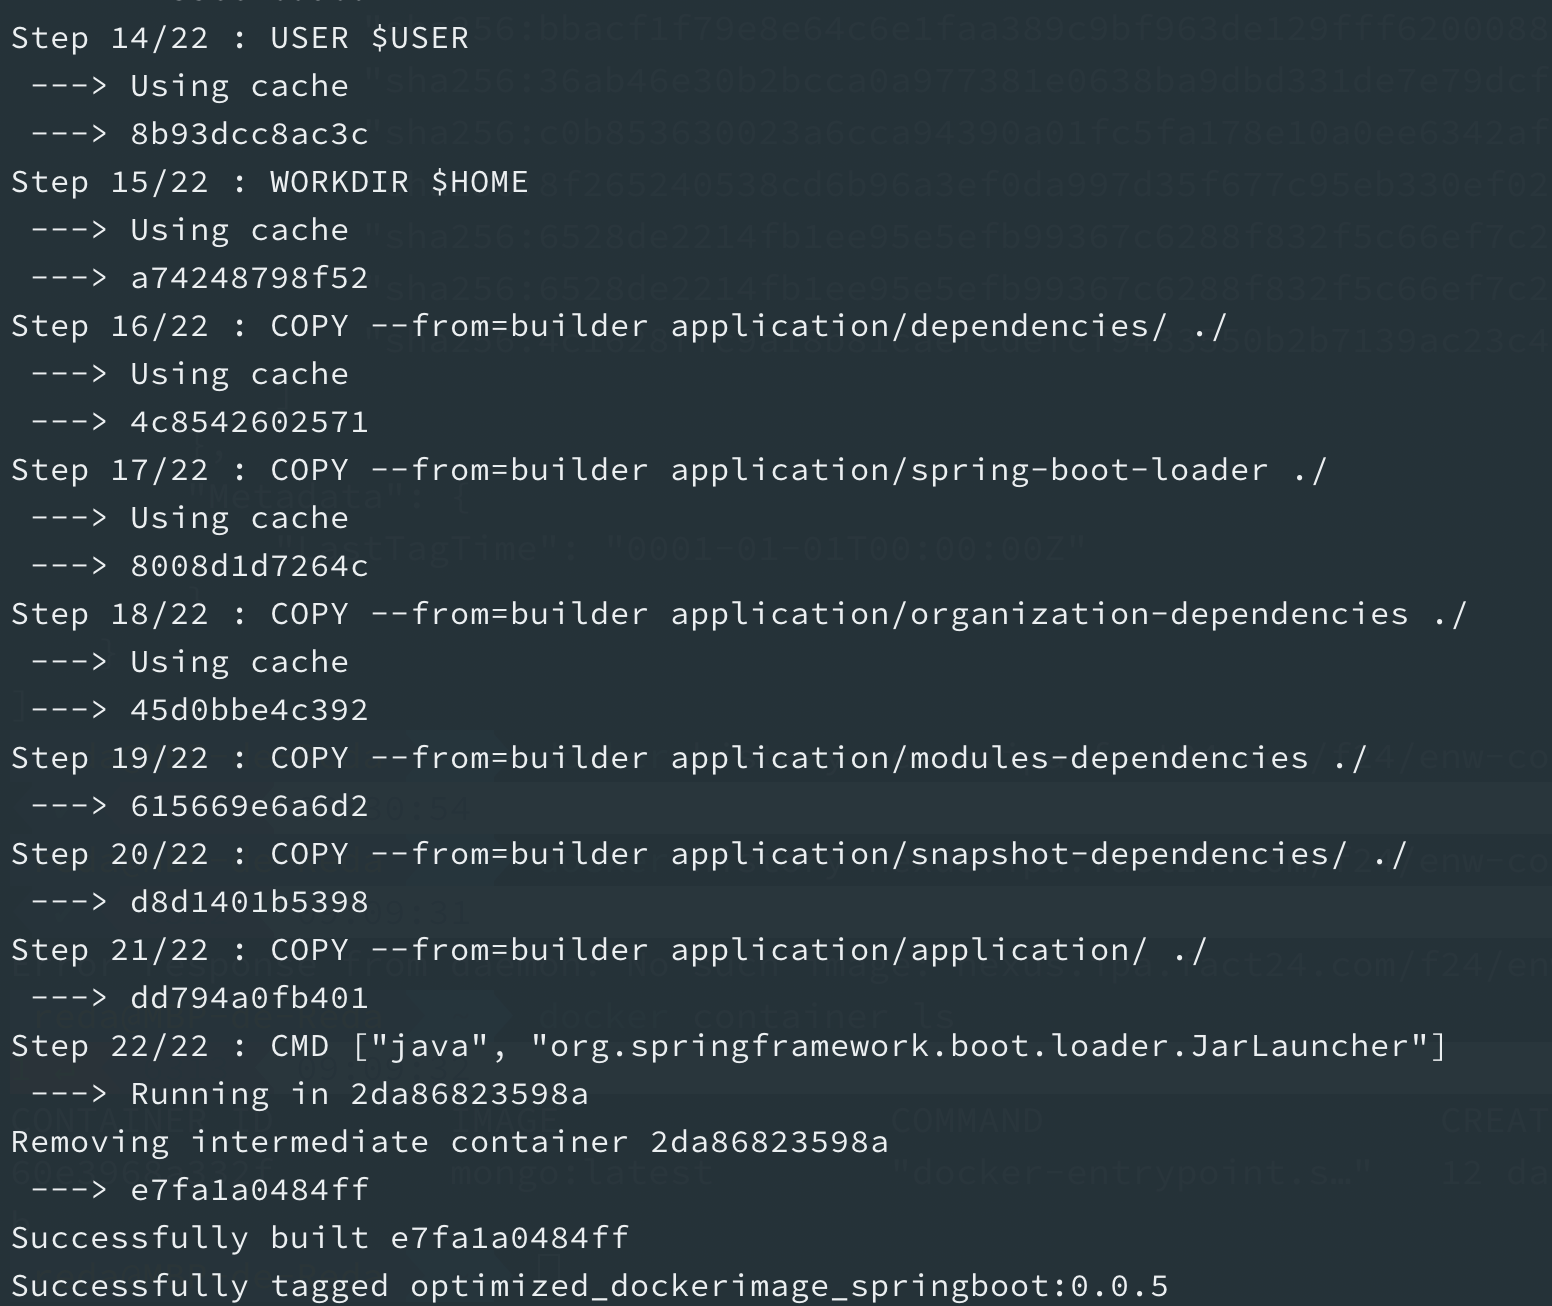
CMD ["java", "org.springframework.boot.loader.JarLauncher"]Now if we build a new version of our docker image, you can see that we take the benefit of Docker cache.
Below I added small change in one of the modules and I rebuilt the docker image thus we can see all previous layers (Step 1 to 18/22) didn't change and took the advantage of Docker cache (--> using cache).
And tadaaaa 👏, we reached our goal defined in the beginning of this post which is to optimize our docker images of Spring Boot based applications with layering feature 💪
Before closing this topic, I'll add below some best practices that every docker user should think about while building image specially with Spring Boot.
Best practices
Now we have optimized our Spring Boot and docker layers, we can see some best practices to have a secure, fast startup and readable docker image.
Non root user
Just as in classic VM-deployments, processes should not be run with root permissions. Your application should have privileges which are essential to perform its intended function.
In other words, the docker image should contain a non-root user that runs the application.
In a Dockerfile, this can be achieved by adding another layer that adds a (system) user and group, then set it as the current user (instead of root):
ARG USER=myuser
ARG HOME=/home/$USER
RUN addgroup --gid 1000 "$USER" \
  && adduser -u 1000 -G "$USER" -h "$HOME" "$USER" --disabled-password
In our multi-stage build, we can add it to our second layer which is runtime. Complete example can be found in Dockerfile in code section of optimized multi-module project.
Labels
Labels are very helpful metadata to organize images, record licensing information, annotate relationships between containers, volumes, and networks, or in any way that makes sense for your business or application.
In a nutshell, docker images with metadata are more readable and easy/quick understandable by others.
Specifying label for docker Image is simple. we just need to specify it as another Dockerfile instruction.
LABEL maintainer="contact@yourcompany.com"
LABEL com.yourcompany.application.name = "optimizedSBDimage"
LABEL com.yourcompany.application.version = "0.0.3"
You can also manage the version value from your Maven version field in pom.xml while building/publishing your docker image to your repo.
You can check the added information under layers section with:
docker image inspect optimized_dockerimage_springboot:0.0.3
Base image
Consider your FROM with using small base image. There is different images whose can be used and maybe smaller than one we used in this post, but you need to know what you want in your base image and select one fills your needs.
We used *-jre base image which means that doesn't include JDK, is smaller than *-jdk but not all apps work with a JRE (as opposed to a JDK), but most do, and indeed some organizations enforce a rule that every app has to because of the risk of misuse of some of the JDK features (like compilation).
Fast startup
If you want to start your app (inside a container) as quickly as possible here is some tweaks you might consider:
- Use Spring Boot >= 2.3 and Spring >= 5.1
- Avoid actuators if you can
- Switch off JMX with
spring.jmx.enabled=false - and more
Resources
Source code: https://github.com/redamessoudi/optimized-docker-image-for-springboot
Spring articles :